Editing SKOS Predicates
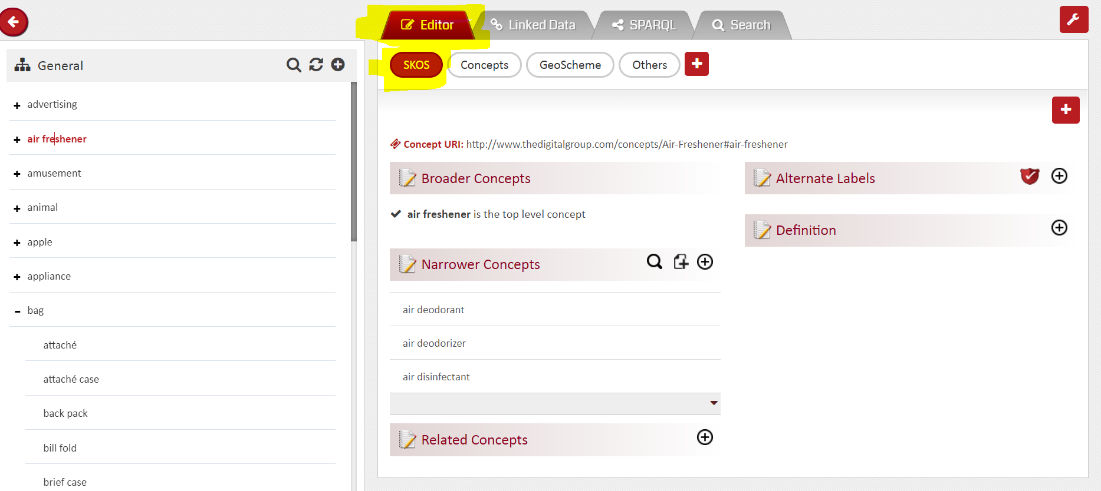
The first scheme displayed in the Scheme Bar of the Editor is ‘SKOS’. By default, it is this scheme that loads in the editor.
Follow below steps to add or edit SKOS predicates:
- In the Ontology Concept Editor, select the Concept whose data you want to edit.
- The ‘Editor’ tab in the Right Panel will show the value(s) of the SKOS predicates for the selected concept. If it does not, click ‘Editor’ tab in Right Panel and select SKOS (oval with label SKOS) from the Scheme Bar.
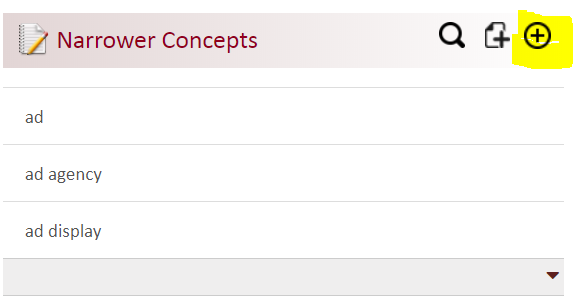
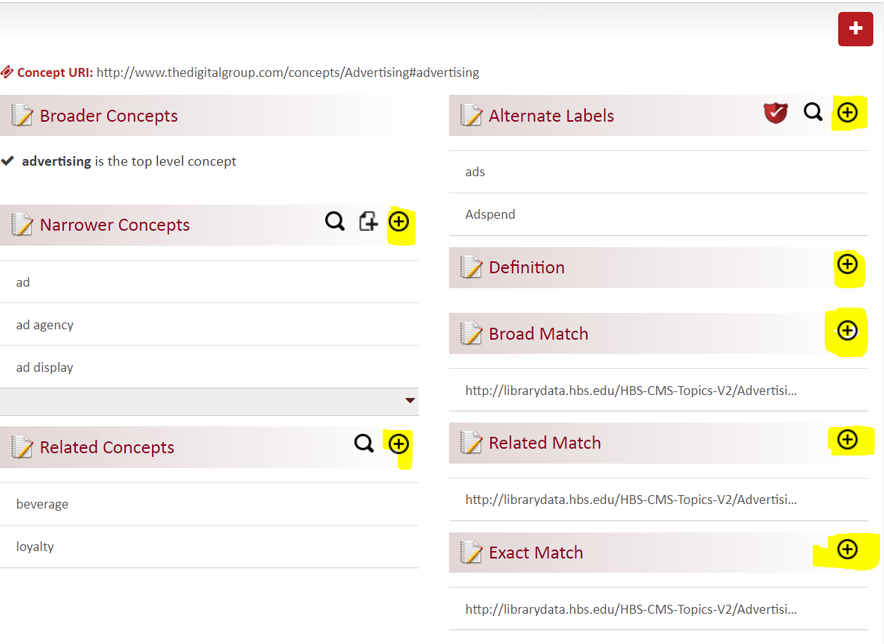
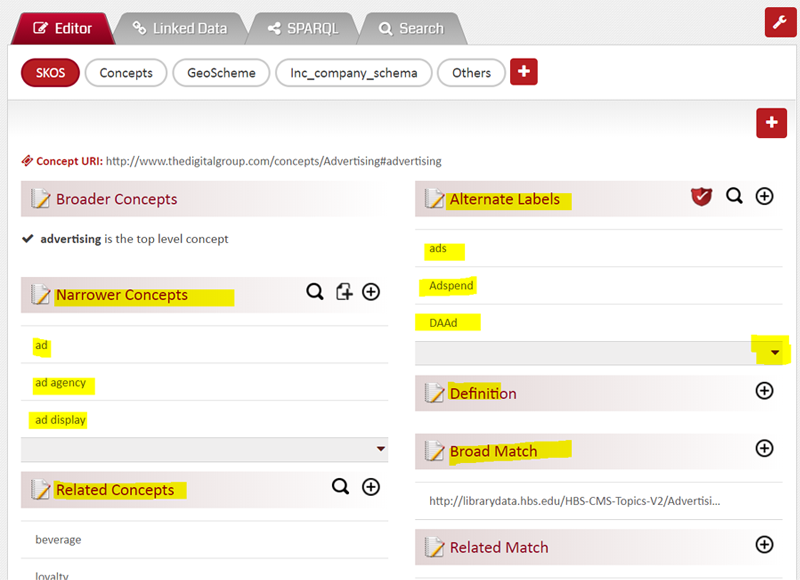
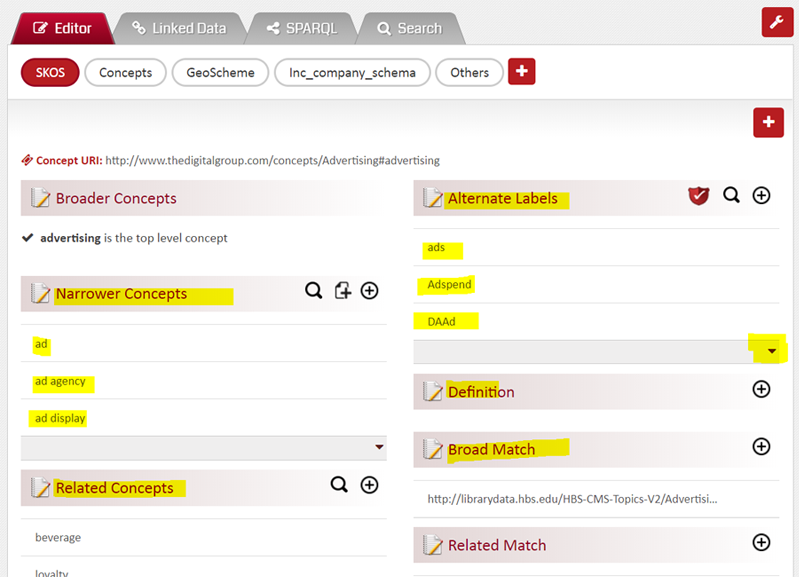
- The Editor will display the Concept URI followed multiple of SKOS predicates. Not all predicates are displayed. The predicates that are displayed are the frequent SKOS predicates (namely prefLabel, broader concepts, narrower concepts, related concepts, altLabels and definition) PLUS any other predicates that have a non-empty value.
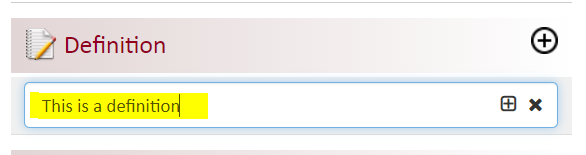
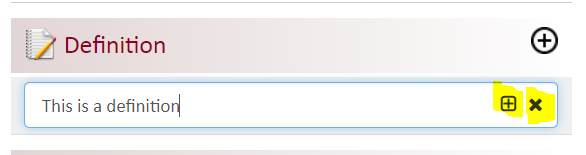
- To ‘Add’ a new value for a predicate displayed in the Right Panel, do the following.
- Locate the desired predicate in the Right Panel and click the circled ‘+’ next to it.
- A textbox will appear below the Predicate name bar. Enter the value in the textbox.
- To complete the action, hit "enter" on keyboard or click the boxed ‘+’ (plus) seen inline within the textbox. To cancel, click ‘x’.
- Addition of Narrower Concepts: The studio allows 2 methods for addition of a Narrower Concept.
First Method is to create a narrower link to an existing Concept
Second Method is a composite action which first creates an altogether new Concept and then creates a narrower link to that new concept.
Follow the steps below to create a Narrower Concept value using the first method.
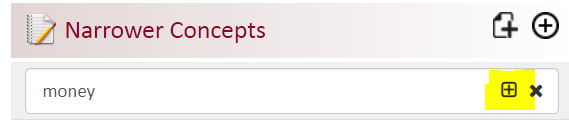
- Click on the rounded ‘+’ next to the Narrower Concept predicate.
- In the textbox that appears, start typing the name of the concept. The system will show you other concepts from this Ontology that match the entered text. Select the appropriate one from the suggestion list as shown below.
- To complete the action, hit "enter" on keyboard or click the boxed ‘+’ (plus) seen inline within the textbox. To cancel, click ‘x’.
- If you wish to use the compound action (create new + link as narrower concept), in the textbox, type the full name of the Narrower Concept you wish to create. Do not select any concept from suggestion list. To complete the action, hit "enter" on keyboard or click the boxed ‘+’ (plus) seen inline within the textbox. To cancel, click ‘x’.

This will create a Narrower link to an existing Concept and the linked concept will be seen under the Narrower Concepts of the selected concept.
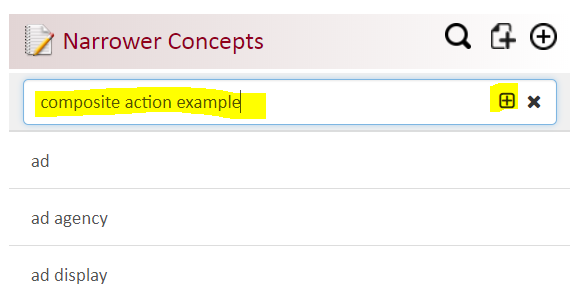
This would create a new concept by given name and also link it as a Narrower Concept.
If you have a list of narrower concepts in a file, you can add them all together a Narrower Concept in a batch action. The middle icon on the predicate name bar allows you to do that. Reach out to 3RDi team to understand the import format and the detailed working of this feature.
- Addition of Related Concepts: Addition of Related Concepts is similar to addition of Narrower Concepts except that here you can only link to an existing Concept.
(Narrower Concepts and Related Concepts are special cases as they are not mere labels. They are URIs of other concepts in the Ontology. Hence, the steps to add a new value for them are slightly modified. Read further in this section to find them.)
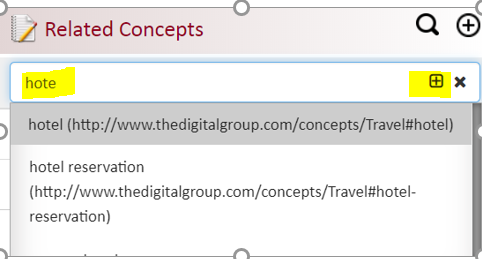
Click on the rounded ‘+’ next on the Related Concept predicate name bar.
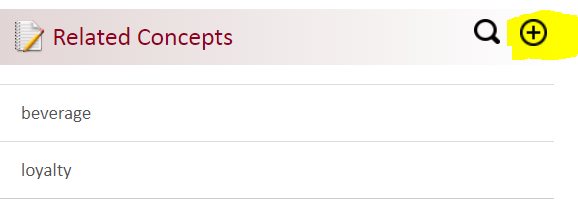
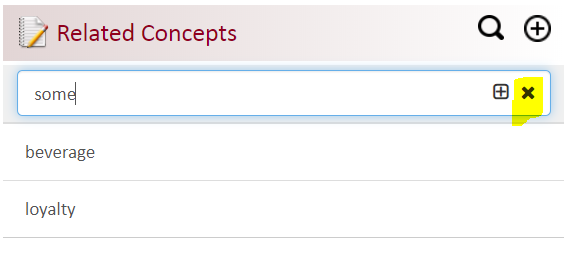
In the textbox that appears, start typing the name of the concept you want to add as Related Concept. The system will show you matching concepts from the Ontology. Select the appropriate one from the suggestion list. To complete the action, hit "enter" on keyboard or click the boxed ‘+’ (plus) seen inline within the textbox.
To Cancel the addition of a Related Concept, click ‘x’.
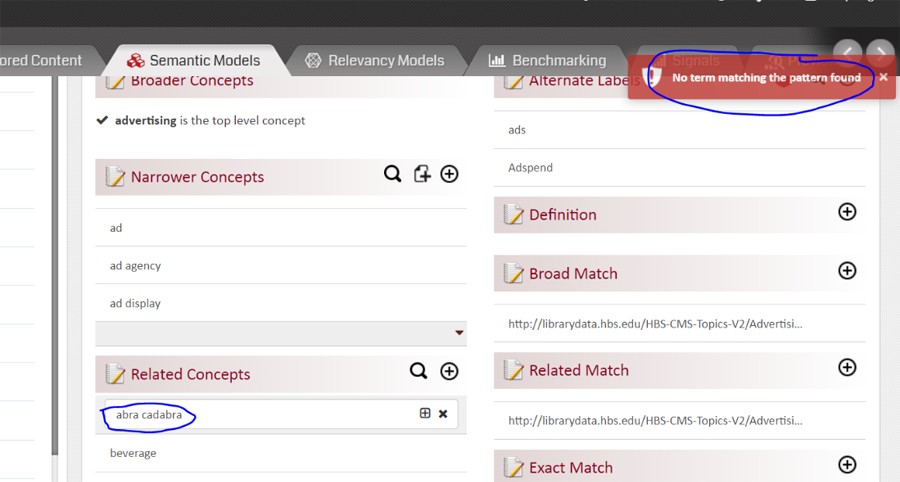
You can only ‘link’ an existing concept here; if you enter a name that does not exist in the Ontology, the system cannot identify it and will show a message as below.
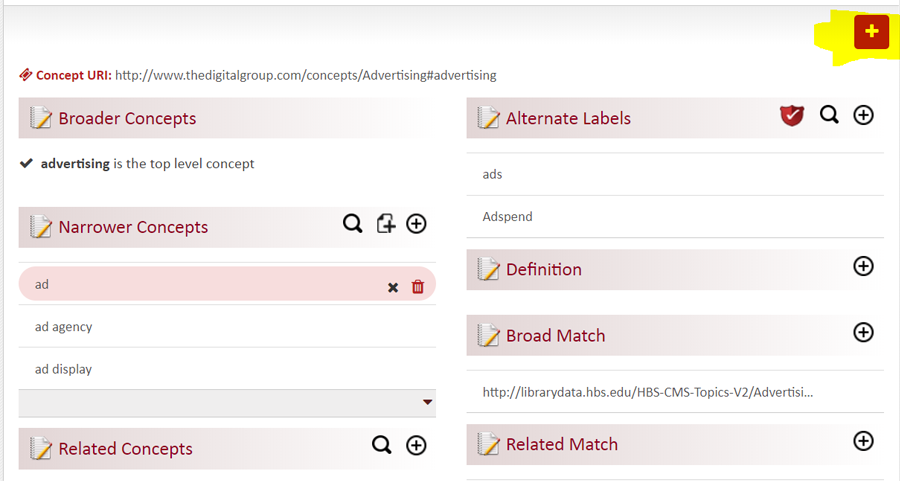
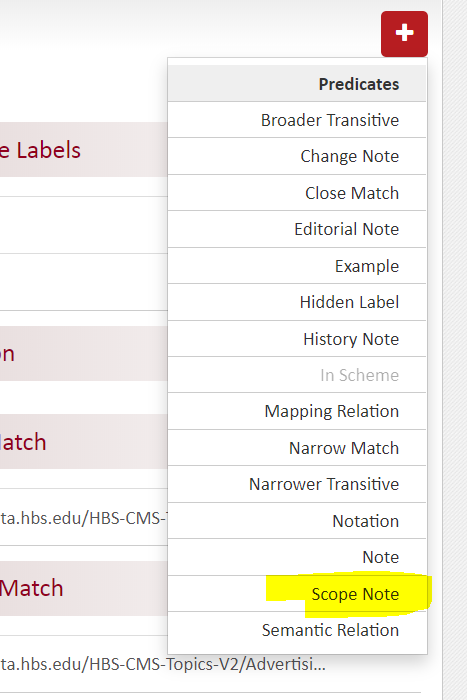
- To ‘Add’ a new value for a predicate not displayed in Right Panel (it would be a predicate which is not frequent, and which does not have a value for this concept), do the following.
- Click on ‘+’ seen towards the right side of the URI.
- A list of possible SKOS predicates will show up. Click on the desired predicate. An example is highlighted below.
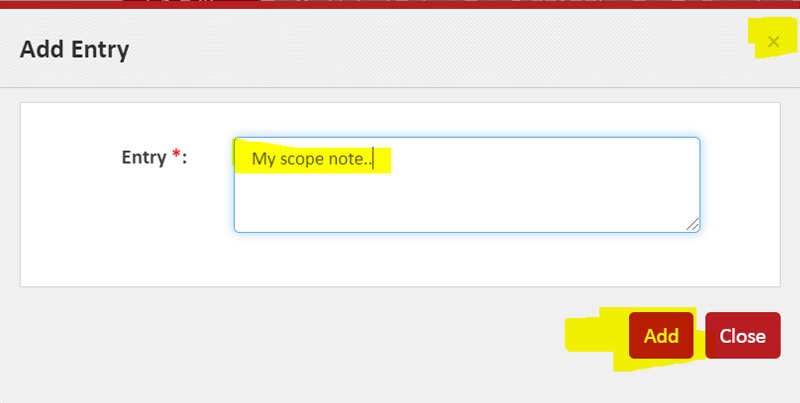
- A pop-up prompting to enter the predicate’s value will appear. Enter the value and click ‘Save’ to complete the action OR click ‘Close’ or ‘x’ to cancel.
- To delete a predicate value, follow the steps below.
- Locate the predicate in the Right Panel. Below the predicate name bar, you would see multiple rows, each row containing one value of the predicate.
If there are no rows, it means there are no values for that predicate.
If there are more than 3 rows, you would need to scroll down in the list using the little down arrow below the 3 displayed values.
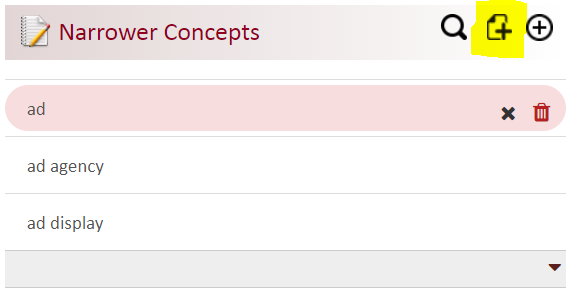
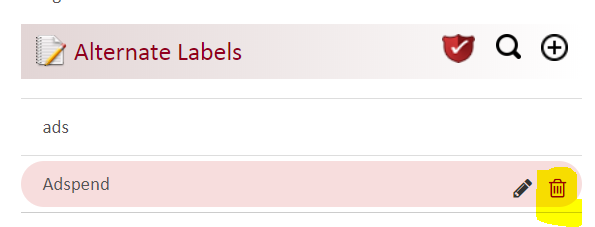
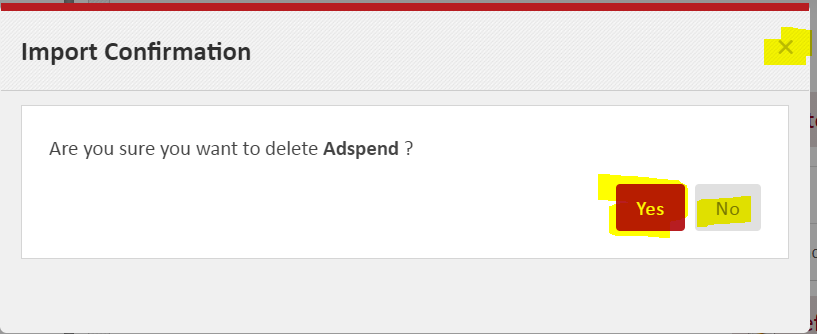
- Hover over the value (or corresponding row) you wish to delete. The row will get a pink highlight and a ‘trash can’ icon will appear to the right of it.
- Click the ‘trash can’ icon. The system will ask for a confirmation. You can confirm by clicking ‘Yes’ or cancel by clicking ‘No’ or ‘x’.
- For Narrower Concepts and Related Concepts, you can either delete the link/relation alone or you can delete the link plus the linked/related concept. When you hover over a Narrower Concept (or a Related Concept), 2 icons are seen to the right of it.
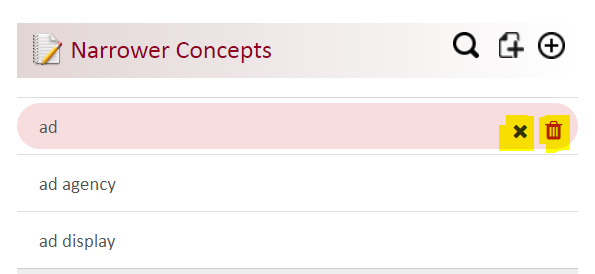
The ‘x’ deletes the link/relation but retains the linked concept while the ‘trash can’ deletes the link/relation as well as the linked/related concept.
- Locate the predicate in the Right Panel. Below the predicate name bar, you would see multiple rows, each row containing one value of the predicate.
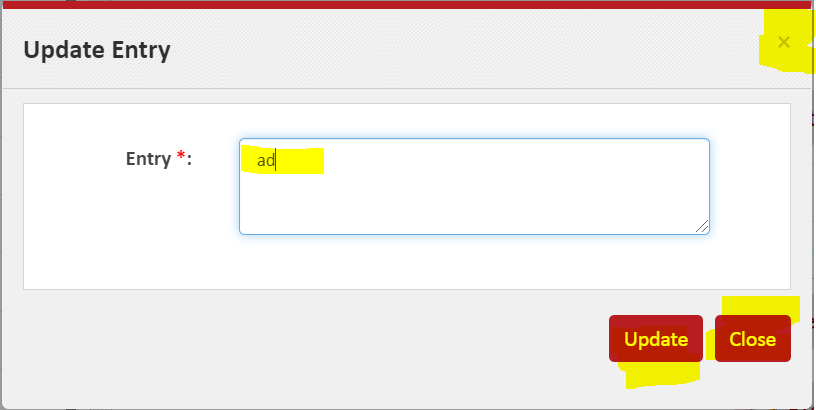
- To ‘edit’ a predicate value, follow the steps below.
- Locate the predicate in the Right Panel. Below the predicate name bar, you would see multiple rows, each row containing one value of the predicate.
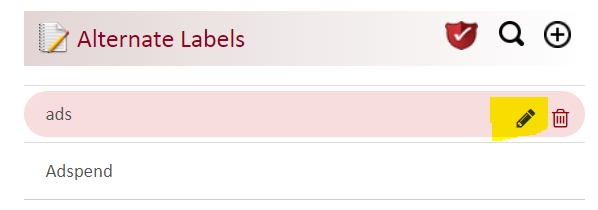
- Hover over the value (or corresponding row) you wish to edit. The row will get a pink highlight and a ‘pencil’ icon will appear to the right of it.
- Click the ‘pencil’ icon. A pop-up with a text box will open. It will display the current value. You can change it as desired. Click 'Update’ to proceed or click 'Close’ or ‘x’ to cancel.
- You cannot edit the Narrower and Related Concepts since there are URIs of other concepts. If you wish to make a change in them, delete the exiting link and add the new one.
If there are no rows, it means there are no values for that predicate. If there are more than 3 rows, you would need to scroll down in the list using the little down arrow below the 3 displayed values.
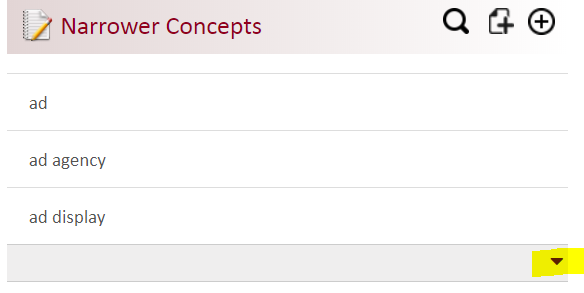
- Sometimes the number of values for a predicate is pretty high and all cannot be displayed and viewed in one shot.
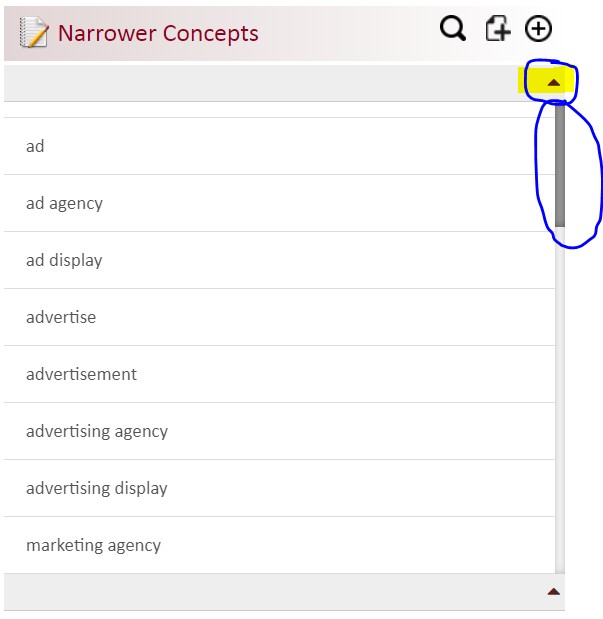
The Studio displays 3 values at one time but gives an option to expand the list to see all values. Click the down arrow seen below the 3rd value.
The list expands as below. You can scroll through it to see all values and you can collapse the list back to 3 rows by clicking on little ‘up arrow’.
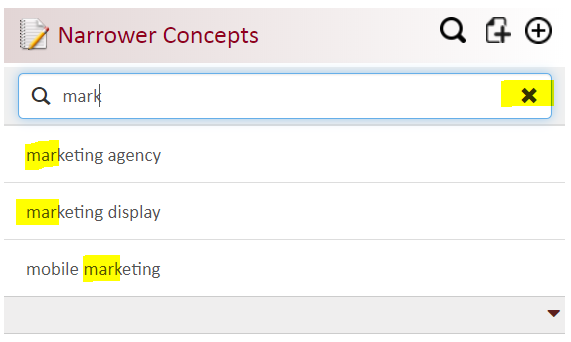
To make it easier to check if a particular value exists or not, a search option is also provided.
Click on ‘magnifying glass’ to the right of the predicate name.
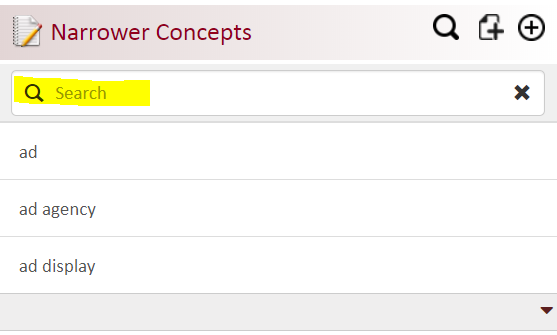
A Search textbox will appear. Start typing the value whose existence you wanted to check. Only the matching values will be displayed. Click ‘x’ to close this predicate value search.
 Disclaimer |
Privacy Policy
Disclaimer |
Privacy Policy