How to work with SPARQL
SPARQL is the third tab in the Ontology Concept Editor. It provides you a console to create SPARQL queries on the Ontology and save it for use in the pipeline.
Studio allows you to create your own SPARQL queries for all Managed Ontologies. The SPRQL query is identified by a name and can be used in Pipeline just like another predicate. This gives a powerful mechanism of navigating through the Ontology in any manner. A user, however, needs to understand RDF and SPARQL in order to be able to effectively create a SPARQL.
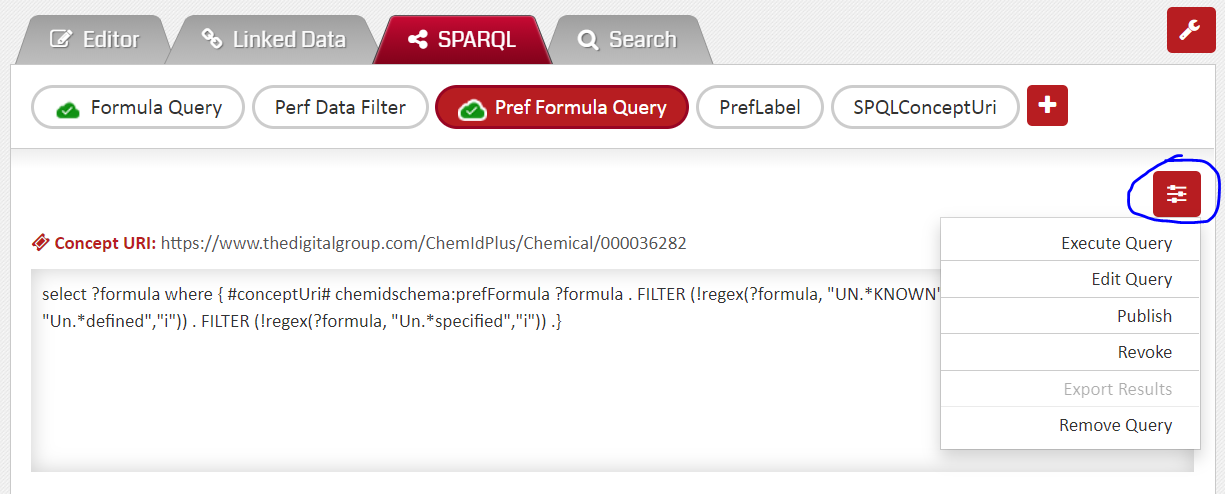
The existing SPARQL queries for an Ontology can be seen by selecting the ‘SPARQL’ tab. Each SPARQL appears in an individual oval identified by its name. You could click on this oval to select the particular SPARQL. You can view, edit, execute, publish or revoke a SPARQL after this selection. If no SPARQLs have been created, this would be empty.
Following are the steps to create a SPARQL:
- Open the desired Ontology and navigate to the SPARQL tab.
- Locate a boxed ‘+’ button in the area below the tabs.
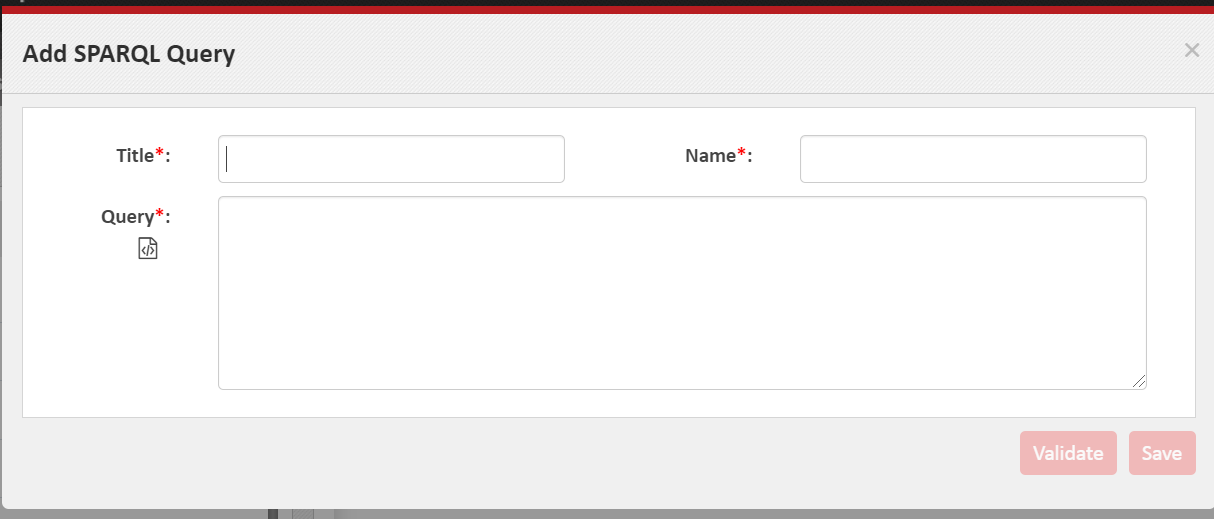
- Click on ‘+’ and fill in the information. The ‘Title’ is display name of the SPARQL, the ‘name’ is the ‘name’ which is the true identifier of the SPARQL, and ‘Query’ is the actual SPARQL query as per the SPARQL query syntax.
- Once you fill in this information, the ‘Validate’ button is enabled. Click on ‘Validate’; if system detects a problem with your query you would see in error message. You should always ‘Validate’ the query before saving it.
- If the query is validated successfully, the ‘Save’ will be enabled for you to save the query. Before you Save, you also get to see the results of executing the SPARQL. If you do not get the desired results, you could change the SPARQL before saving it. But, you could also ‘Save’ it now and edit it later.
- Once a SPARQL has been created, it will be visible under the SPARQL tab.
- Locate a ‘Tune/Adjust’ button on the right side just above the box which shows you the long SPARQL query string. This button provides options to Execute, Edit, Publish, Revoke and Remove the SPARQL. You could pick the one as desired.
- The SPARQL must be published before it can be used in the Pipeline. Use the ‘Publish’ option on the ‘Tune/Adjust’ button to ‘Publish’ the SPARQL.

 Disclaimer |
Privacy Policy
Disclaimer |
Privacy Policy