How to add a new Concept
To add a new concept, follow the below steps.
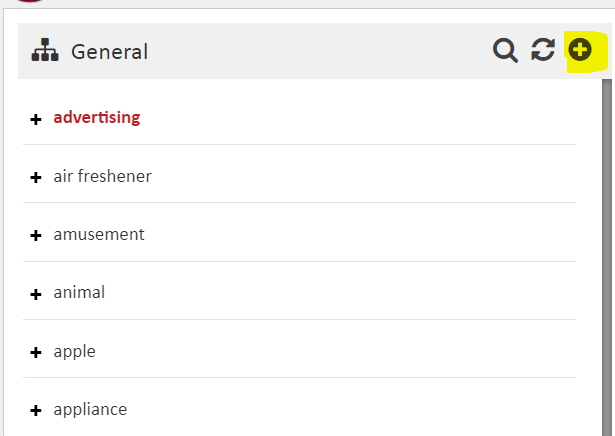
- Click on circled ‘+’ icon on top right of Left Panel.
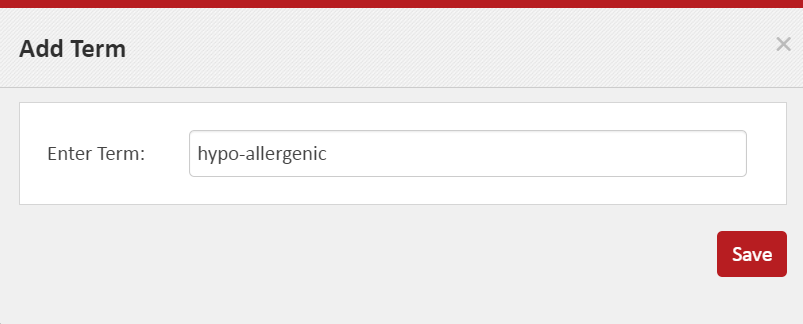
- This will display a pop-up asking you to enter the new Concept’s name. Enter the Name.
- Click Save to complete the action. To Cancel, simply click the ‘x’ at the top right of the pop-up.
- The newly added Concept will be visible in the Left Panel.
- To add a new Concept as ‘narrower’ to an existing Concept, locate the Concept under which you wish to add the new Concept, that is, locate the immediate broader Concept of the Concept being added. Click or hover over the immediate broader concept. You would see a ‘+’ and a ‘x’ appear on the right.
- If you wish to edit more details of the newly added Concept, ‘select’ it by clicking on it. Once selected, use the Right Panel to add more details to this concept.

The name you enter is treated as the prefLabel of the concept. This name should be unique amongst its siblings. This check is present so that you avoid creating duplicate concepts. In a rare case, if you have a requirement to give the same name as that of an existing sibling, you can first create the new Concept with a dummy unique name and then edit the prefLabel of the new Concept to the desired one.

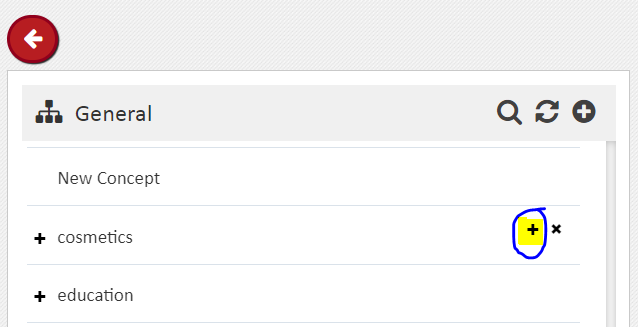
Click the ‘+’. This will display a pop-up asking you to enter the new concept’s name. Enter the Concept name and click save.
© T/DG 2020 | Product By
 Disclaimer |
Privacy Policy
Disclaimer |
Privacy Policy
Disclaimer |
Privacy Policy