How to Import data (concepts) into an Ontology
Apart from creating concepts in the Studio, you can also import them from a file. The import can overwrite all the existing concepts in the Ontology, or it can incrementally import only the changes and new additions from the input file.
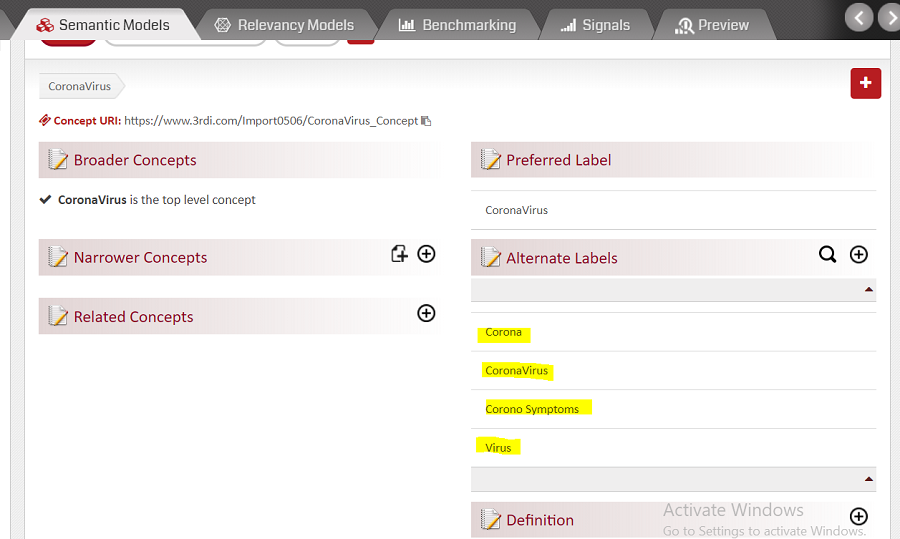
The following are the steps to import Concepts in an Ontology:
- Select the Ontology shell you wish to import into. (Refer Browsing the List of Ontologies and Selecting One).
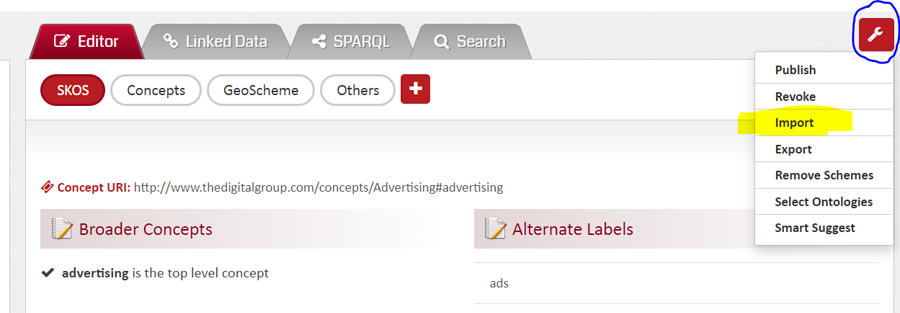
- Open the Ontology Concept Editor by double clicking on the Ontology name.
- On the right extreme of the Right Panel, you would see a 'wrench’ icon. Click on it. The context menu will have multiple options. Select the ‘Import’ option.
- The ‘Import’ pop-up will open as below.
- You need to make the appropriate selections in this box.
- (What to) Import:
- Upload type:
- File type:
- File format:
- File:
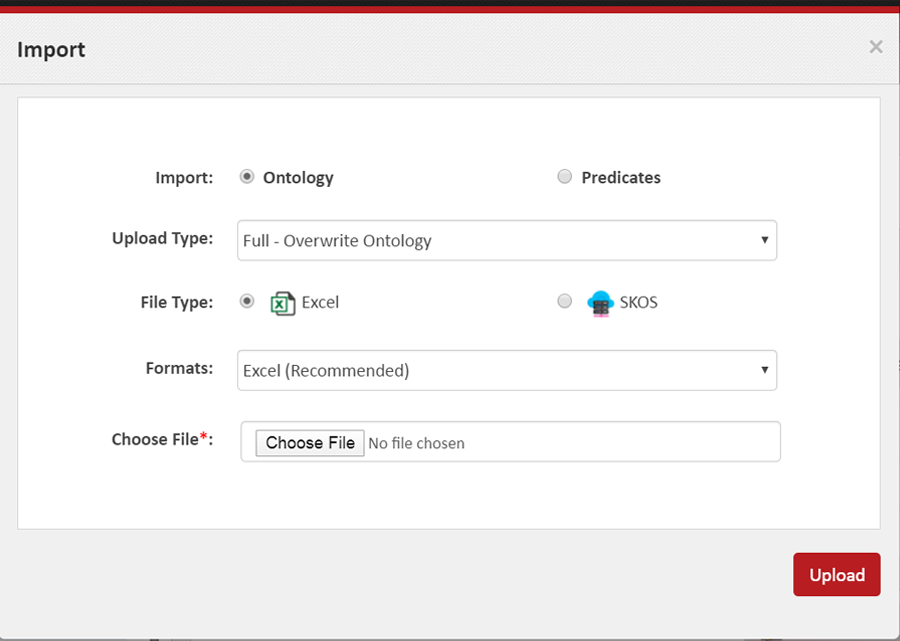
Select ‘Ontology’ if you wish to import the full Ontology and select ‘Predicates’ if you only wish to import data of some predicates. You would select the ‘Predicates’ option, if the input file does not have data of all predicates.
4 types of uploads are supported. Chose the appropriate one.
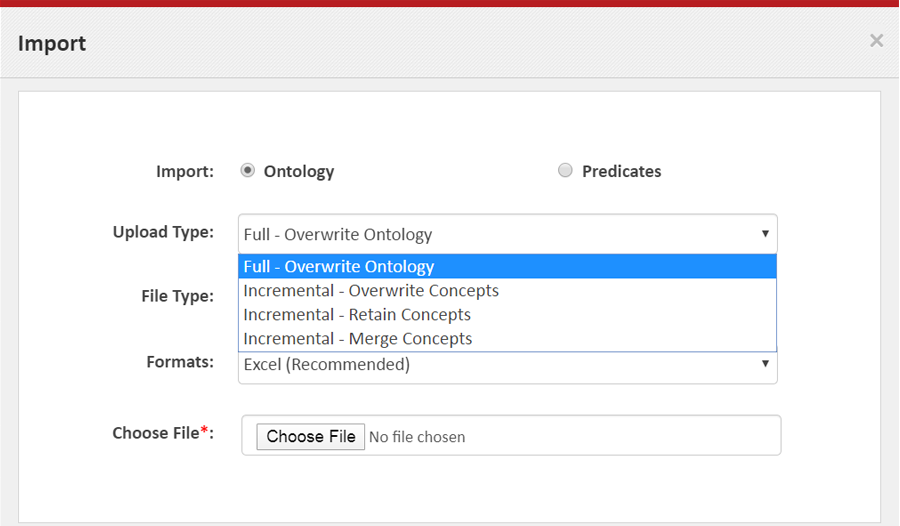
FULL – Overwrite Ontology: This option will wipe out the existing ontology totally and upload the Input file. All existing ontology’s data will be erased.
Incremental - Overwrite Concept: This option will wipe out only those concepts of the Ontology which also exist in the input file. Other concepts of the existing ontology will be retained as it is.
Incremental - Retain Concepts: This option will retain the existing concepts of the Ontology as it is and only import the data of any new concepts from the input file.
Incremental – Merge Concepts – This option will add the concepts data from the input file to existing data of the concept.
In most cases either ‘Full-Overwrite Ontology’ or ‘Incremental-Merge Concepts’ does the job.
Select Excel or SKOS as per the input file.
Within each file type, there are distinct formats to be selected from. Depending on the input file, select the appropriate format.
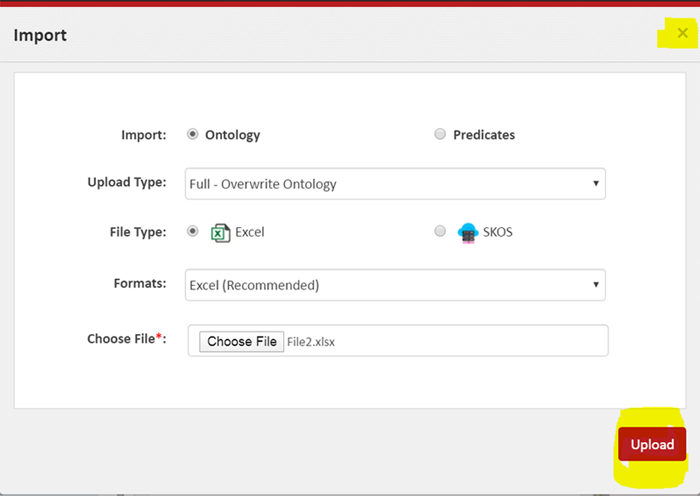
Click ‘Chose File’ to browse and select a file.
- Finally click Upload. To close without uploading, click ‘x’. Once you start the upload by clicking ‘Upload’, the upload cannot be stopped. Be sure that you have selected the right options and the file before you click ‘Upload’.
- On successful import, the uploaded data will show in the editor. The time taken to import a Ontology depends on its size. For a large Ontology, having thousands of concepts, it may take a few minutes. Also, Excel imports are usually slower than RDF imports. So, before trying to import your file again wait for some time.
When would you need Excel import:
It is common for Organization to maintain Ontologies or Concept Lists in Excel files, especially, when they evolve before the Organization adopts the Semantic Web standards. In such cases, importing concepts (and their related information) from Excel files is useful.
Excel Import format:
Excel Format has 2 options for selection namely Excel-Recommended and Excel-Traditional. As the name suggests, Excel-Recommended is the recommended format. It is more compact, more understandable and an easier format to maintain. Excel-Traditional is maintained for backward compatibility and does not support new features. Users are advised to select Excel-Recommended format.
Excel Recommended format:
The Row#1 is the ‘headings’ row and should define what each column contains. To indicate hierarchy, that is broader terms, you should use heading like ‘Level 1 Term’, ‘Level 2 Term’, ‘Level 3 Term’ etc. For other properties, the ‘heading’ should be some SKOS predicate. You can also extend this to work with custom schemes by proving a heading like
A snapshot of a sample import file is provided below. Notice, how individual rows define the Level 1, Level 2 and Level 3 terms. Column ‘D’ contains ‘altLabel’ and Column ‘E’ contains ‘definition’. Any other predicates from SKOS or custom Schemes can also be added here.

User Defined text splitter in vocabulary :
User can also customise the predicate with different split values. You can specify the splitter character series in curly bracket {} at the end of each column header (Predicate Name). You can either use a single character for splitter text within curly bracket e.g{|} OR series of characters e.g {:|:).
The combination of , ; : | . splitter characters are supported for the column headers.
Snapshot of import file with Sample Header is as shown in below image:

When the concepts are successfully imported the values are spitted to different lines as displayed in the below image:
 Disclaimer |
Privacy Policy
Disclaimer |
Privacy Policy